Film Studies and Cinematography / Final Project: Storyboard and Animatic
19.11.2024 - 10.1.2025 / Week 10 - Week 14
Adriena Tan Yan Zi/ 0351236 / BA of Design (HONS) in Creative Media
Film Studies and Cinematography
Final Project

Instructions
Final Project: Storyboard and Animatics
1. Objective: The objective of this project is to produce
a 1-3 minute animatics storyboard based on your approved short
animation.
2. Requirements: The animatic storyboard production must
be based on the proposed story ideas developed for Project 1.
3. Deliverables:
a. Prepare thumbnail drawing (10%)
- Sketch your story ideas on A4 paper.
- You are free to use any kind of format as long as the story can be understood in an orderly manner.
- Feel free to use text to add description.
- Present in the class for brainstorming purposes.
- Output all drawings as one pdf file.
b. Prepare storyboard (10%)
- Format: A4 size with landscape orientation
- Contents:
- Panel no
- Pages no
- Description
- - action
- - audio (monologue, dialogue, sound effects)
- - effects (fire, explosion etc)
- Duration
- You can download from any storyboard template.
- Use an arrow to guide the action and camera work.
- Use black and white colour tone to show some depth in the composition
- You can plan the drawing as a layer such as background, prop, character etc. to make it animatable for animatics.
- Output all pages as one pdf file.
c. Prepare animatic (10%)
- Using any editing software such as Adobe Premiere, create a new project with 1280 x 720 size and 24fps framerate.
- Import the image of each panel and arrange them according to the panel sequence.
- Put the right estimated duration of each panel. Preview and edit back and forth to get the right pacing, continuity and screen direction.
- Animate the character action and camera works, replacing the arrow direction in the storyboard. You may have different layers of the shot such as background, prop, character etc to make it animatable in the editing software.
- Animate the transitions (fade in, fade out, dissolve etc.)
- Put the audio elements such as music background that can enhance the emotion of the shot, voice over (dialogue / monologue) and sound effects.
- Indicate of each panel number and timecode through text overlays
- Output the video as mp4 format
4. Upload thumbnail, storyboard and animatics on MyTimes.
5. Update all the progress in e-portfolio.
6. Deadline for submission is by Week 14.
Thumbnail Drawing
After developing all three acts of my story and completing a detailed
script, I shared my idea of including only part of Act 2 and the entirety
of Act 3 to stay within the time limit. My instructor agreed with this
approach, so I moved on to creating thumbnail drawings to roughly
visualize the settings and camera angles for each scene.

Thumnail #1
Thumbnail #2
As most of my scenes occurred in similar settings, I explored a wide range
of camera angles to maintain visual interest. Additionally, I incorporated
shots that emphasized the characters' expressions to effectively convey the
emotions of each scene. I consulted with sir and got his approval before
moving on with the next part which is storyboarding.
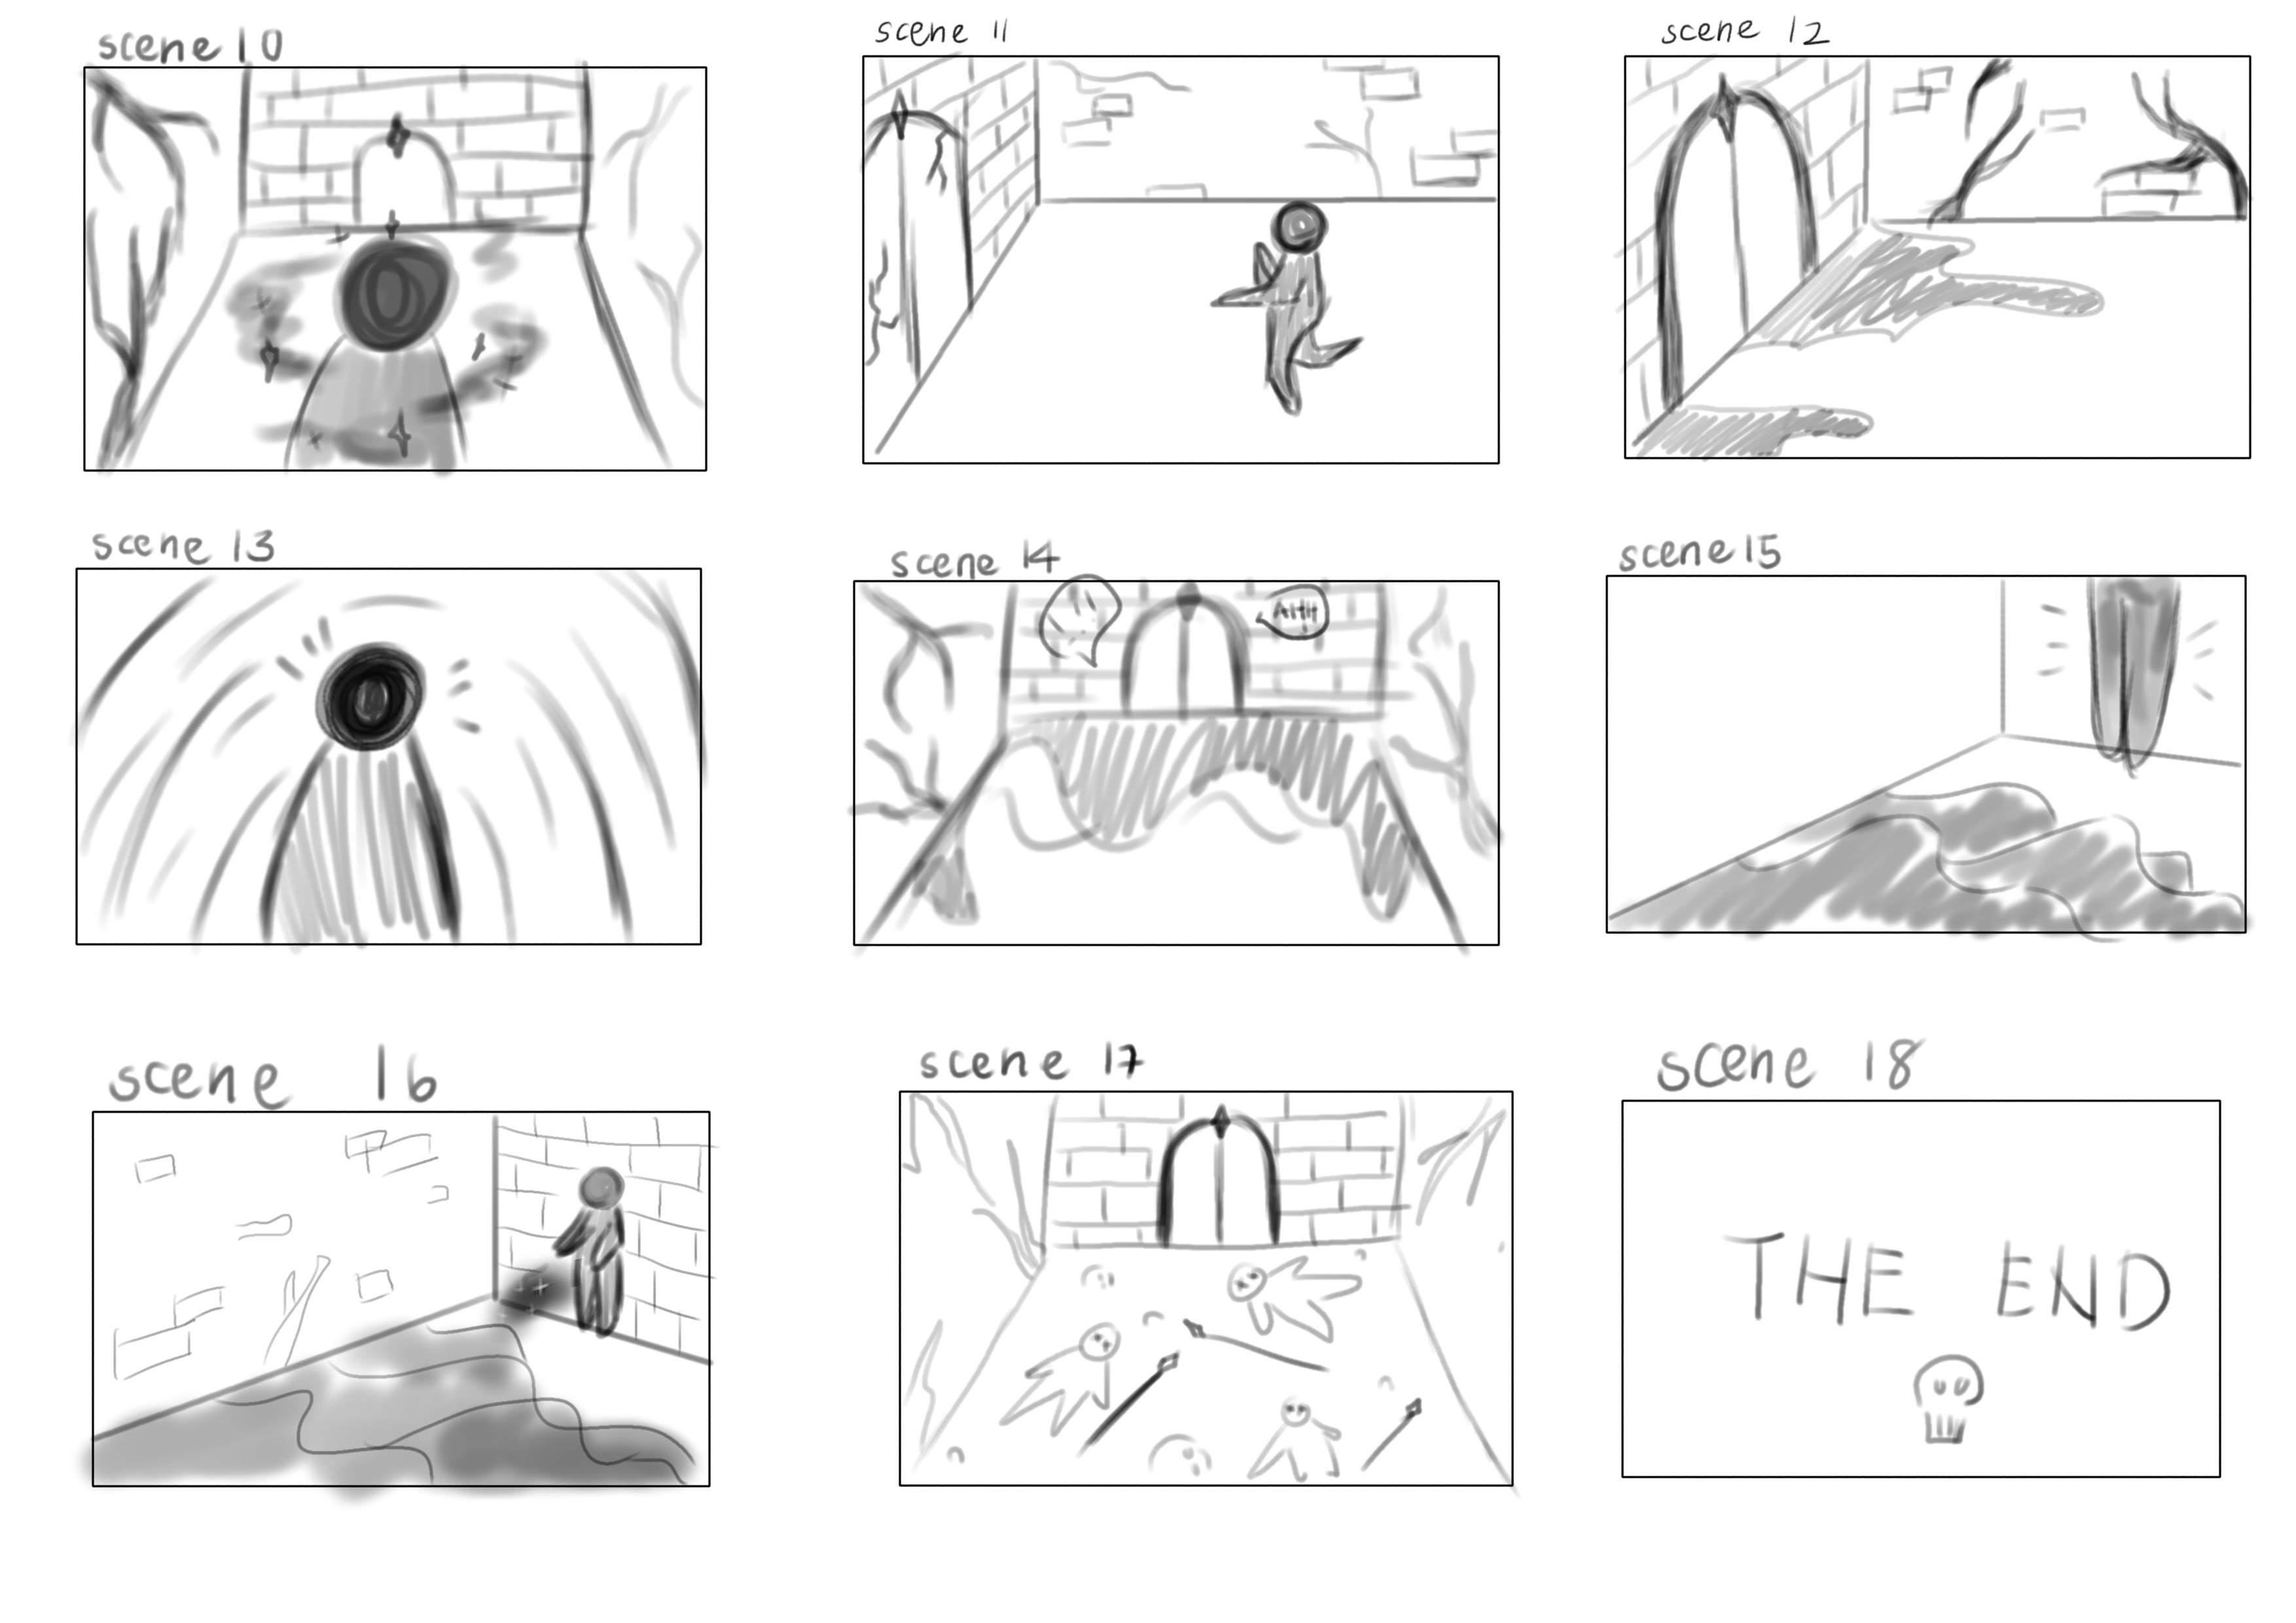
Storyboarding
For the storyboard, I built upon the thumbnail drawings I had previously
created, using them as a foundation to guide my process. I aimed to add as
much detail as possible to each panel, including aspects such as character
positioning, precise camera angles, background elements, and key visual
cues. This level of detail allowed me to closely envision how the final
animatic would appear, ensuring a clear and cohesive flow between scenes and
effectively capturing the intended mood and storytelling dynamics.

Storyboard #1

Storyboard #2

Storyboard #3
Animatics
For the animatics, I began animating in Krita based on the approved
storyboard. Initially, I considered creating the assets separately and
importing them into After Effects for animation. However, I ultimately chose
to animate frame by frame directly in Krita. This approach provided greater
flexibility to adjust the characters' movements and expressions while also
allowing me to create smoother and more fluid magic particle effects, which
I felt aligned better with my creative vision.
In Krita


Editing in Adobe Audition & Premiere Pro
After I finished animaitng the scenes I imported the compiled version into
Adobe Audition so I can edit in the sound effects and background music. I
listed out the sound effects I needed for the scenes and sourced the sound
effects from the Freesound website.


Final Project: Storyboard and Animatics
Thumbnails.pdf
Storyboard.pdf
Final animatics.mp4
Feedback
Week 12:
The storyboard looks nice, please hurry and proceed to the animatics.
Reflection
Working on the animatics was a rewarding yet challenging experience that pushed me to refine my skills and make thoughtful creative decisions. Initially, I had planned to create the assets separately and animate them in After Effects, a workflow I believed would streamline the process. However, as I progressed, I realized that animating frame by frame in Krita offered greater artistic flexibility, especially when it came to capturing subtle movements and expressions. This approach also allowed me to achieve a more fluid and organic effect for elements like magic particles, enhancing the overall aesthetic and emotional impact of the scenes.
While this method required more time and effort, it gave me the freedom to make real-time adjustments and experiment with dynamic expressions and gestures that better conveyed the characters' emotions. The decision to deviate from my initial plan ultimately proved to be a valuable learning experience, as it highlighted the importance of adaptability and aligning techniques with creative intent.
Looking back, I’m quite happy with how the animatics turned out and the progress I made in both technical execution and storytelling. This project reinforced my understanding of the importance of flexibility in creative workflows and my confidence in choosing approaches that best serve the narrative and visual goals.
.jpg)
.jpg)
Comments
Post a Comment