24.9.2024 - 29.10.2024 / Week 1 - Week
Adriena Tan Yan Zi /
0351236 / BA of Design (HONS) in Creative Media
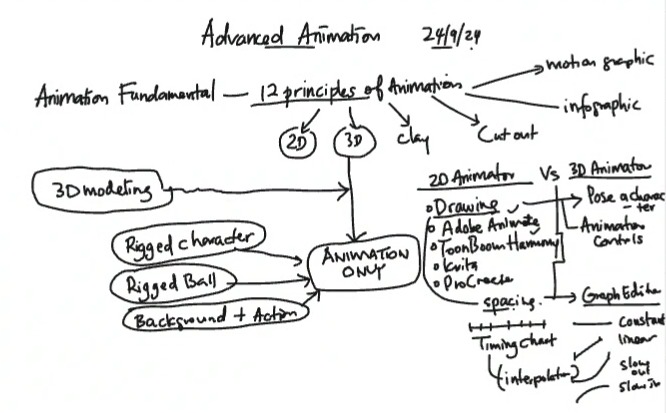
Advanced animation
Exercises
Lectures
Week 1:
Will be provided with a RIGGED 3D model so we can only focused on the
animation part.
Install Blender:
- 3.6 (Long term support)
- 4.2 Character rigging problem
On week 5, we will be learning how to do blocking, polishing, keyframes,
interpolation (contrast, slow in, slow out). If we are junior we need to
understand the concept of layout first.
For this week, sir was explaining the fundamentals of animating a 3D
bouncing ball.
3D animation doesn't require drawings like in 2D animation.
Always
use bouncing ball as your first exercise.
3D modeling
Object mode - Bone system (position, rotation and scale)
Edit mode
We can use simple deform modifier to bend our objects but remember to apply,
all transform to make sure every unit is at 1.00 to have the modifier work
properly.
To add bone: Go to add on the top bar, add armature and single bone. I can
extrude it to 3 bone to fit the solid and move them around with grab or move
tool.
Go to object mode, select the bone and the object and press ctrl +P =
parent
Jumping ball animation (second arc)
To make the second arc for the jumping ball animation, move the ball
further away from the middle and create another keyframe at
frame 49 with I. Update path. select the red hoop and go back to 25, right click add
handle(free) and make the curved down(graph) line straight. add 12 more
frames which is at frame 37 to position the ball floating on top, the
middle of the curve. Then chick back to frame 25 and make the line curved
and update path.
To rotate the ball
Use the yellow hoop to rotate the ball.
Inset(I) rotation at frame1 and go to the last frame and change the Y
rotation to 360degress and insert rotation frame again.
If no line is showing on the graph, go to view and frame all.
We have to select the control in of the ball in order to change to pose
mode.
Week 3:
1st frame: Select the red circle, rotate according to the arc > [i] > rotation
Contact frame: Set rotation to 0
Frame 19 (In between): Rotate circle according to the arc > [i] > rotation + Select the green circle (top) > Stretch > [i] > location
Contact frame: Rotate according to arc > [i] > rotation
Copy contact frame and paste to the next frame > set rotation to 0 > Squash > [i] > location
Week 4:
Top one is root control, master control and tail control
1. Click the second and the third nub control and go to modification, under copy rotation turn off the eye button (make it sleep) for independent control.
2. We can reset our rotation by selecting the nub you want to reset, press alt+R.
3. To make all the nubs move together after turning off the eye thing, i can select them and go to the top and change it to individual origins.
Week 5: If we move one joint and the whole arm move means we're in IK.
Normally when we're using IK we get a straight line, if FK we can control individual part.
To return back to original pose: Select part, pose, clear transform - all.
We can select individual joints to control.
Can copy the pose from the left arm, got to pose on the top and paste pose flipped.
FK is the red colour control.
Instructions
Exercises
Exercise 1: Bouncing ball animation
A) Football (normal weight)
The normal weight football animation was being guided and demonstrated by the lecturer in class as the rest of us follow along. We were shown how to inset graph editor, make path for the arc and add rotation to the ball.
We were also taught to apply linear to the x line to keep the arc balance on
the graph apply free handle type onto the nodes to while adjusting the curve
of the arc.
Then, we are asked to render our animation in the rendering port which I
then added light to the set and determined the background. I wanted the
background to mimic the football field with the green floor. Once I'm happy
with the visual, i just rendered it.
Revised
B) Ping Pong ball (Light weight)
For the ping pong ball, after watching the sample video, I started with
9 frame and the progressingly lessen and or the peak of the arc i just cut
them in half. I made about like 9 arcs for the PingPong ball.
While rendering my set, I wanted the pingpong ball's setting to be darker to I
only place one spotlight above and change the background colour to light
pink to make the blue stand out.
Revised
C) Bowling ball (Heavy)
For bowling ball, the bounce in between slows down faster and cause
lesser bounce which means lesser arcs. I made about 4-5 arcs for the
bowling ball.
For the bowling rendering, I also want it in a dim lighting as if it is in a
bowling ally so i once gain only put a single lighting. Also using sager
editor, I manage to put texture on the plank.
D) Beach Ball (Light weight)
Did about 7 arcs for beach ball as they are light and bounces more which
creates more arcs while travelling a distance. The first arc i put in 24
frames and the rest i just gradually lessen for a bit like the next one would
be 18 then 12 so on. or the peak of the arc i just divide those frame into
half.


E) Squash and stretch
In week 3 tutorial class, we were being explained how to apply squash and stretch to our previous exercise to give it more flexibility and dimension. The squash and stretch worked just fine but the rotation was a bit odd as I found out at the end the rotation should be at 500 something which i got it wrong at first but fixed it.
Exercise 2: Pendulum animation
In this exercise, we are required to animate a pendulum movement with follow-through with the given file. We have 3 pendulum file to choose from but we just went for the normal one.
The whole tutorial is demonstrated and recorded in teams as well. We were demonstrated how to split the timeline and control each of the nub to keep the movement more fluid than sticky. This way the animation would look more smooth.
Rendering
I put double lighting into the set to make it brighter, and render with colours that I think suited the pendulum as well.
Final animation
Exercise 3: Emotion Poses
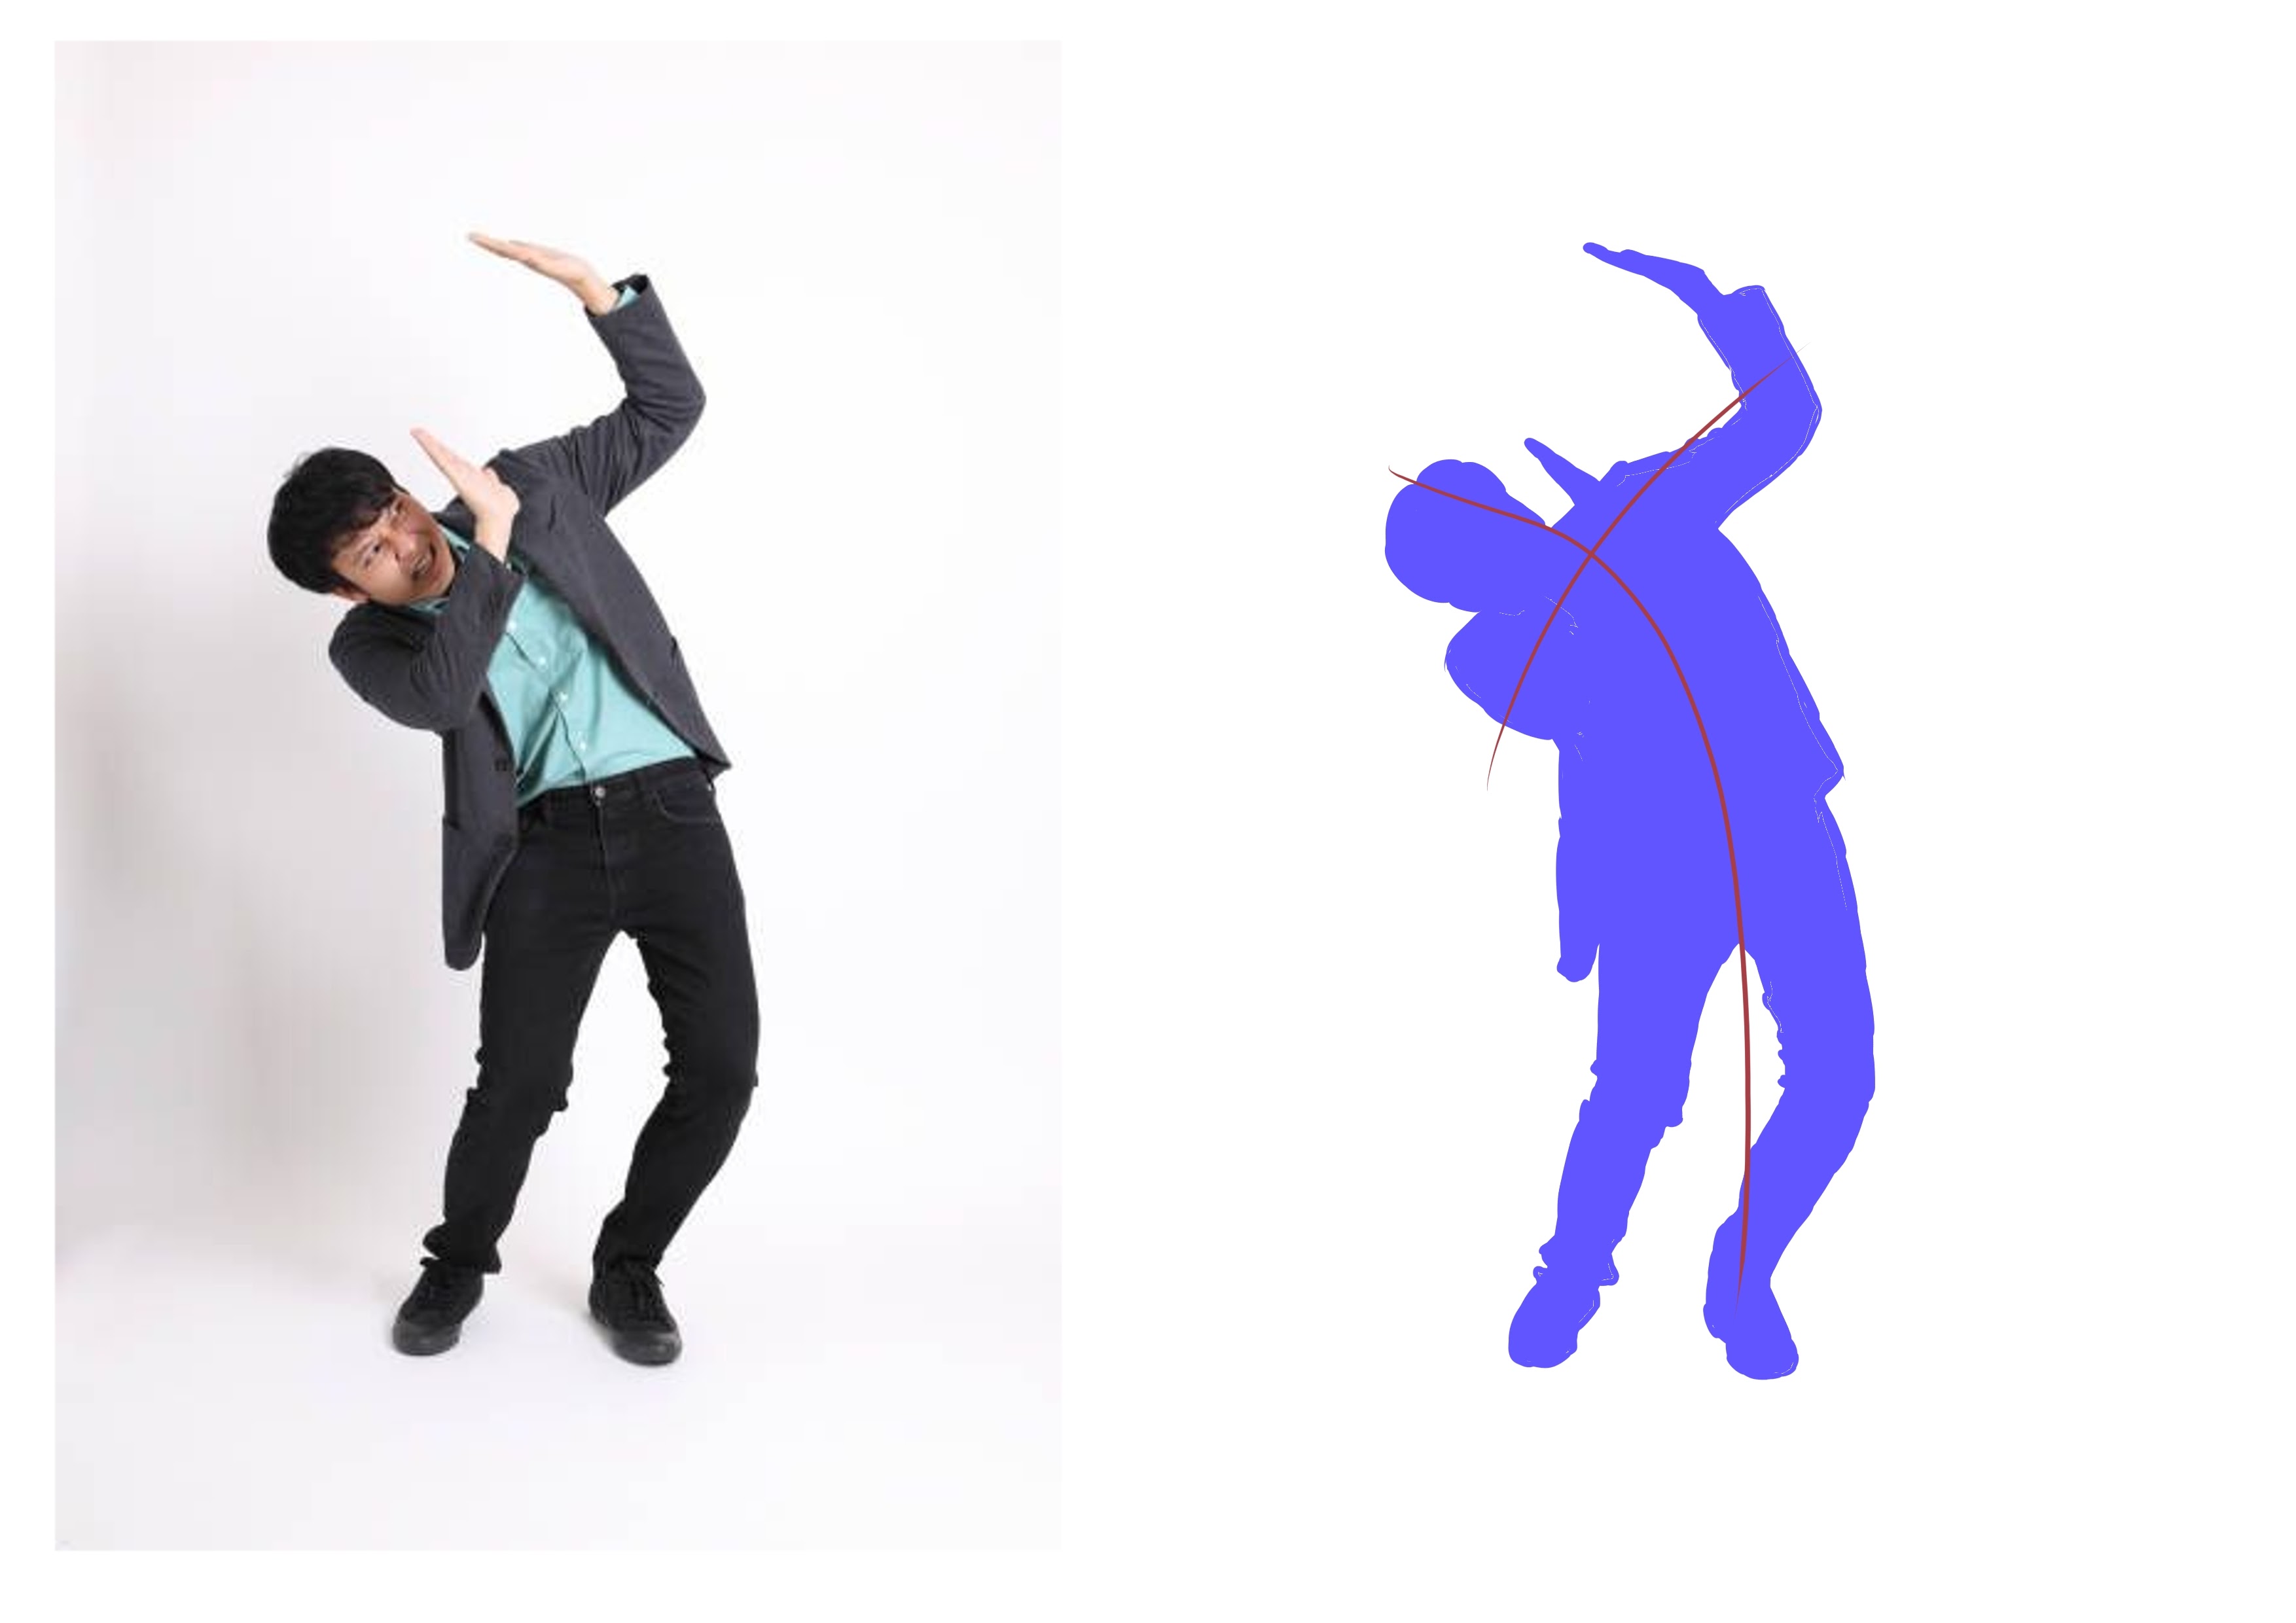
For this exercise, we are to practice how to post a rigger 3D model given by the lecturer. It was asked of us to study the line of action from examples and study the silhouette to help us better visualise the poses on the character better.
Instructions:
1. Download this ccharacter rigs for the exercise:
Snow - https://studio.blender.org/characters/snow/v2/
2. Explore and understand the rig.
3. Find image/video reference for action poses that show these emotions.
4. Observe the reference. Spot the key or storytelling pose and its dynamic.
5. Draw from your study of the pose to show:
- Line of action
- Silhouette
- Weight and balance / contrapposto
- Avoid parallel and twinning.
6. Pose the character’ body and facial expression to depict the action and emotion
I went on Pinterest and Google to find a few example poses that I thought would look good on the character model and study those poses drawing out the line of action.
Process in Blender
Happy
Firstly I focused on trying to pose the model's body sideways with the reference photo and line of action I inserted. I twisted his lower body more than the top half and had to make sure that the direction of his knees and his feet as well. I also had to adjust this head facing direction so it looks like he's facing the camera.
Here I'm just working on the details of the hand and the position of the arms as in the reference as it was a bit tricky for me while keeping track of the elbow so that the model's arm doesn't look contorted. Then I moved on to adjust his happy expression and made him wink.
Sad
For the sad pose, I needed to make Snow sit down and spread his legs a little so the overall pose looks more relaxed instead of doll like. I had to select his upper body control and hip controls to make him sit down naturally. I posed one of his arm carefully of on e of his knee like the picture and made sure the elbow are coordinated as well.
For his expression, I tried to make him frown in by adjusting his eyes, brows and his mouths to make his expression more exaggerated.
Angry
For the angry pose, I rotated his body and adjusted legs to spread them a little and change the direction of the feet so he looks more natural. I folded his arm and adjust the direction of the elbow and knees so that they are not twisted. I had to double check to see if the model's palm position is placed properly on this hips.
I adjust his other hand position and made it so that it looks like he's pointing at someone like he was scolding someone.
Scared
First i tried to make the model lean back as I observe from the line of action, the model is curved and leaned back like he's backing off from something.
Here, I had to position his arms and palm in the right direction that doesn't block his face and turn the legs made sure to bend it little so that he doesn't seem as though he's about to fall instead he's just defending himself.
Final Exercise 3: Good PosesFinal Good Poses - Happy
Final Good Poses - Sad
Final Good Poses - Scared
Revised poses
Final revised Good Poses - Happy
Final Good Poses - Sad
Final revised Good Poses - Angry
Final revised Good Poses - Scared
Feedback
Week 3:
Soccer ball: the arc distant can be more narrow towards the end.
Ping pong: The arc seems inconsistent, could be rounder.
Beach ball: Could be a bit slower since it's so light.
Week 4:
Squash and stretch - I could change the ball type.
Week 5:
The back can have a bit more.
Week 6:
Angry - Can play around with line of action and bend the waist a bit more
Happy - I can bend him a bit more, make it more exaggerated.
Sad - Body can be heavier, the feet can be put down

Scared- the line of action is good, the legs need to show a bit of balance, the palm can be facing the camera. The fingers can be a bit more interesting
Reflection
For the first exercise, we began by animating a ball. It was essential not only to follow all the initial steps to get the ball moving but also to pay close attention to the timing to ensure the fluidity of the motion and the curve of the ball's trajectory. Initially, I found it quite overwhelming, as it was challenging to keep up with the instructor's explanations on how to place the ball and create keyframes. It was also confusing to figure out which controls to use to move the ball correctly. However, once I got the hang of the basic controls, I was able to focus more on the finer details in the subsequent exercises, such as the curvature of the path, how much to stretch and squash the ball, and, of course, the timing. Despite completing all the exercises, I still don't feel confident about timing the movement of objects, even with something like the pendulum. If I had more time, I would like to practice the timing aspect more, especially with the other pendulum exercise, such as the claw from a claw machine. For exercise 3, I focused on studying the line of action and the expressions for each of the required emotions. I began by sketching the silhouettes and revisited online videos to refresh my understanding of how to analyze the line of action accurately. I spent a significant amount of time preparing before actually posing the model, which turned out to be very helpful as I was able to pose and use references simultaneously.
.jpg)


.jpg)
.jpg)

Comments
Post a Comment