Motion Graphics - Exercises
24/04/2024 - 10/05/2024 / Week 1 - Week 3
Adriena Tan Yan Zi / 0351236
Motion
Graphics/ Bachelor of Design (Hons) in Creative Media
Exercises
.jpg)
Lectures
Week 5:
Right click and mask, choose path mask to play arounc.
Can play around with motion blur.
Instructions
Exercises
ctrl + click
go to new layer contrl c and then contrl v
W2_TUTORIAL_DIGITAL COLLAGE
Cutting out and combining in Photoshop


This is the process of the background i use for the first composition, I start choosing one of the background then cut out the building from a picture given by sir.


Then I realised the background and the buiding doesnt really match so i added an adjustment layer to adjust the colour and blended. Moved on to cutting out the cars that i needed.


I wanted this compisition to be retro themed so I put in the objects that looked retro to me and adjust their colours and hue along the way to match the building.


Here i'm selecting the retro television and applied a blending option to it as i find it works best with the rest of the elements.

Added the airplane as I think it ties the whole composition together with the whole vintage looking vibe and once again adjusted the colour as I find the original white colour stood out too much to blend in.


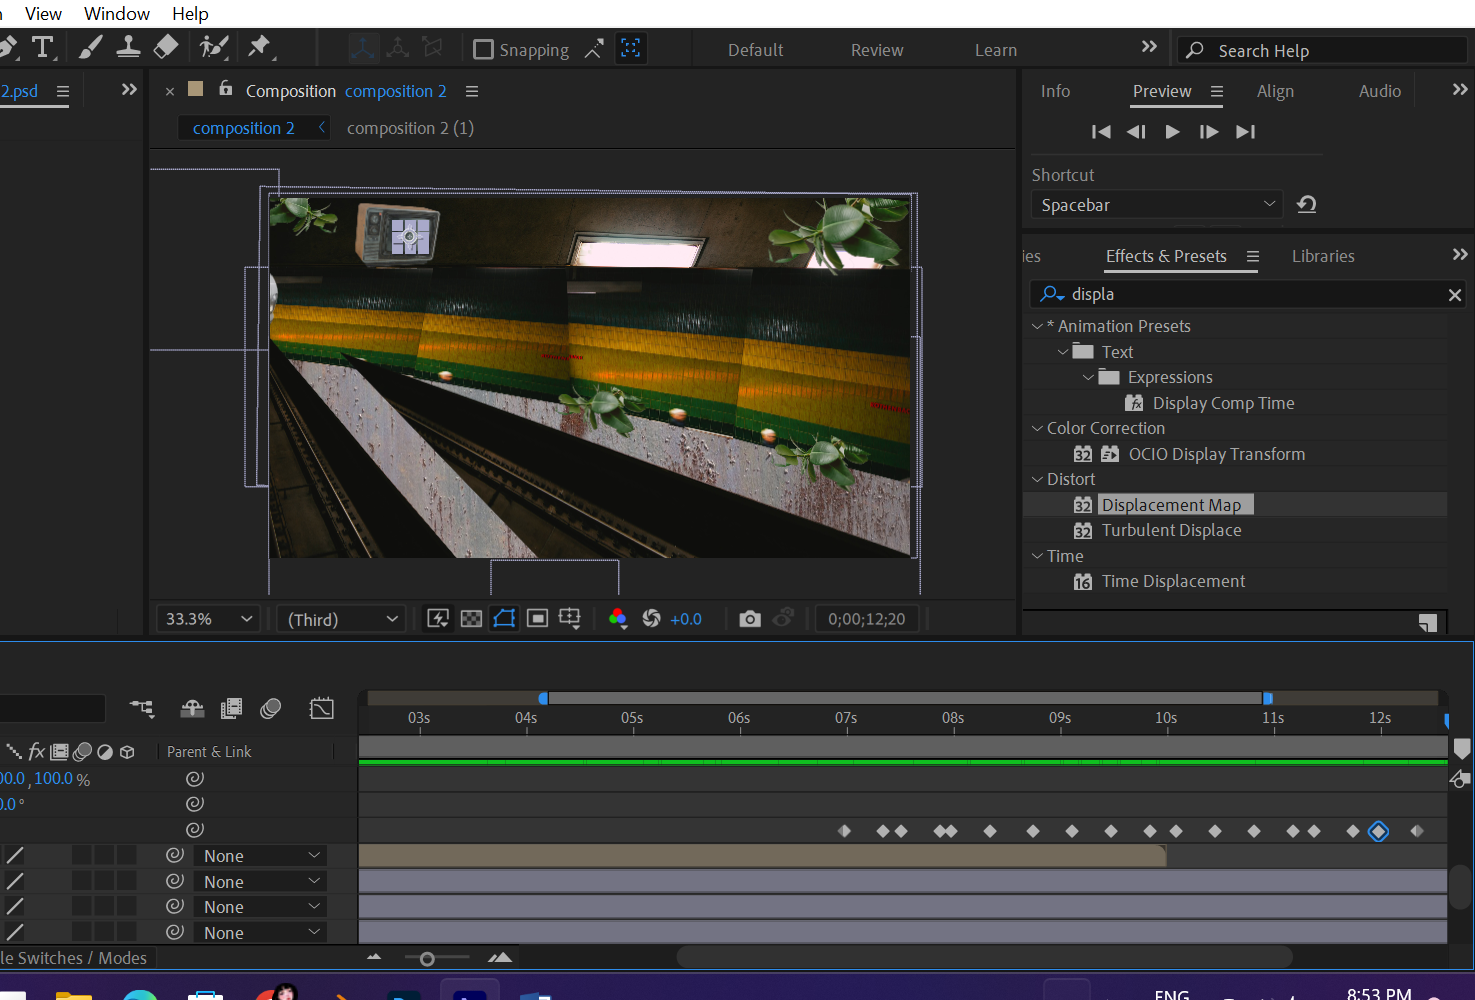
I cut the images of the subways wall out and duplicated them to buil a wall. Then I cut out the ceiling, floor, rails and a car to portray a car driving through the suburbs.


I suddenly got an idea of putting a line of car like they are driving behind each other. Got the idea of putting like a cctv viewscreen on the ceiling which is then I added the retro TV.


Then to make it more realistic, I added some leaves on the edges and corners of the images to make the whole tunnel look like it's old and abandoned where wild plants are growing.

For the third composition, I cut out the mountain fromt hat one image sir gave and duplicate them as I'm trying to achieve a valley looking composition.

Then I put in the fighting seens on each of the mountain to portray a scene where the fencer is fighting to get the bottom of the valley.


I got the idea of adding a sun to the back to complete this landscape oriented composition by cutting a part out of the shark and colour it before blending in photoshop.
Animating in After Effects


I imported all the elements from photoshop as compostion, retain layer size and start animating the position of the car.


Then I moved on to applying the same aniamtion keyframes for the second car just a little later so it looks like the second car is following behind.


Moving on, here im just making the leaves wayer a little as the car is passing by. As more the grain on the right side, i was trying to make the car in the tv glitch but it ended up didnt work so i gave up that idea.
So I used the opacity animation tool to do the appear and disappear, so it looks like a glitch.
Final compilations
Composition 1

Composition 2

Composition 3

\\\\ Final animation (After effects) \\\\
W5 PRACTICAL: ADVANCE LAYERS, KEYFRAMING, BASIC ANIMATION
Compositing in Photoshop


To start off I cut of some part of the given textured images intending to use it as the background. I started with the orange texture background which im was not happy with so I decided to leave it be until I have an idea what the elements would look like.


I had an idea to do double exposure with the buidling and the background, touching up by erasing some parts of the building to give the old and damage aesthetic. Once i'm finally happy with thow the building looks with the background, I went ahead to using the pentool, cut out somemore buildings to make the composition sort of like a city/ town square concept.


Did double exposure with the back building as well and erased some parts to match the aesthetic to the first building. Added the 3rd buidling and some sharks because I had an idea of making the flying sharks fly in to destroy the buildings.


The for the final part, I needed to replace the damaged buildings with their original state so I had to cut the original one out again to layer them on top so I could animate the transition later in After Effects.
Animating in After Effects


Firstly, i needed to arrange the timeline so I would have the background to appear when the animation starts. However I didn't the backgroun to stay stationary so I added the fade it animation to start off the animation.


Then I started animating the original buildings to appear into the composition. Then I moved on to the shark and I had an idea to make them more realistic, I was drawn to use the puppet pin tool.


Here Im just applying the puppet tool to all three of my sharks one by one. Pinning their tails so later on then I animate them mocing in, their tails would along too.


Then, using the position animation, I moved the sharks consecutively so they would all rushed in at once which I think would be too distracting to focus on their movement.


Then, as the shark passedd by or moved in the buidlings, I had to animate the building being damaged as if the sharks brought destruction and tragedy along with them. Finally, to signify the seriousness of the destruction, I waned to animate a glitch to the background. I searched up a tutorial on how to do it on youtube.

Finally to top it all off, i was encouraged to paired it with music that matches the rhythm and vibe of this animation. I inserted a rock and grudgy music.
Final composition

.jpg)
.jpg)

Comments
Post a Comment